In Which the Cure is Worse than the Disease
I wasn't going to blog about this method of no-sew mitering, because from my point of view the cons far outweigh the pros. This might have been the most miserable experience of my knitting life. (I can't say for sure, as I tend to deliberately forget these things after a while.)
But once I was done with the block, it looked so neat and tidy. Almost as neat on the right side as mattress stitch (and maybe could be just as neat as mattress stitch, for a knitter with sufficient intarsia experience). And much, much neater than mattress stitch on the wrong side. The effect on the wrong side was pronounced enough to convince me that this method might hypothetically be of some use. Someday. To someone not me.
So, here you go.
A Method for No-Sew Mitered Squares: Intarsia "In the Round"

CONS
Fiddly
Tangle Quotient exceeds tolerances
Not Portable
Slow (sewing might be faster)
Low spontenaity in re color choice (must simultanously cast on all four miters in the block)
Generally sucks all the joy out of mitering
PROS
Neat, even on the wrong-side
WHAT YOU WILL NEED
Circular needles and DPNs of appropriate size. I started with a 24 inch circular for the smaller size of stockinette miter (i.e., casting on 48 stitches) using Rowan Denim, which has an approximate tension/gauge of 20 sts per 10 cm/4 in.
Enough skeins (or smaller balls) of yarn to work 4 mitered squares simultaneously. For me, this was eight balls of yarn, 4 each of two colors.
ROUGHLY HOW TO DO IT
Sadly, you can't do intarsia in the round by just knitting round and round. If you try this, you will quickly find that your working yarns don't end up where you need them to be for the next round.
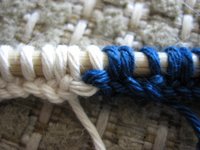
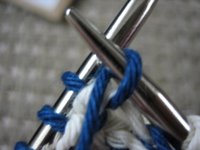
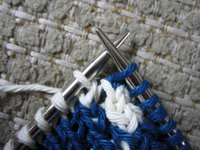
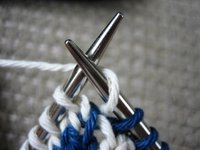
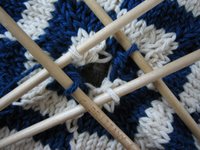
But there is a trick you can use. You still knit back and forth, first on the wrong side, then on the right, just as you would if you were knitting "flat." But at the very beginning of each row, you create an extra stitch with a YO. And at the end of that row, you knit or purl (as appropriate) this YO with the last stitch in the row. This joins the two edges of your knitting seamlessly.
The joining technique is very simple, once you do it a few times. What'll get to you is all the working yarns.
NOTE -- there is more than one method of intarsia-in-the-round out there. They are not all suited for all purposes. I don't know whether another method would work for mitered squares.
SPECIFICALLY HOW TO DO IT
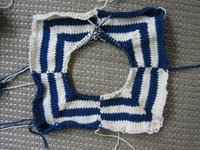
 1.) Using a circular needle, cast on for 4 mitered squares.
Where appropriate, change the yarn used to cast on, so that the color of the cast-on edge is the first color you plan to use for each mitered square. (You could skip changing the colors if you don't mind a border around your block -- that would marginally simplify things and would probably look quite nice.) I used the knitted cast on, but I don't think it much matters.
In other words, I cast on 48 stitches for the first square, changed colors, cast on 48 more stitches, changed colors, cast on 48 more stitches, changed colors, and cast on a final 48 more stitches.
 2.) Row 1 (Wrong Side). YO,
 purl to last stitch (changing working yarns for each miter and twisting the old and new working yarns together at each transition),
 purl last stitch in row together with YO created at beginning of row.
 Turn.
Turn.
 3.) Row 2 (Right Side). YO,
 knit to last stitch (changing working yarns for each miter, twisting the new and old working yarns together at each transition, and decreasing where appropriate to form miters),
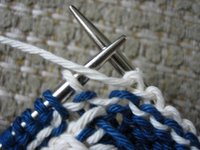
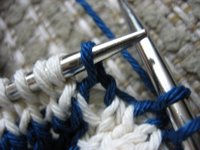
 ssk last stitch with YO created at beginning of row. Turn.
It is important to use an ssk (or equivalent left leaning decrease) so that the correct color yarn shows on the right side. If you use a k2tog, the border between one square and another at your join will be wonky.
 4.) Repeat rows 1 and 2, changing colors in each miter where desired.
 5.) Switch to DPNs when you like.
 6.) When you are down to 1 stitch per square (4 stitches total),
 thread one of your working yarns through all four stitches. Pull tight.
7.) Kay's instructions take it from here. You could either make additional individual blocks and then join them later with a 3-needle bind off or crochet or whatever. Or you could pick up stitches from the edge of this first block for your second block. (Insane . . . )
WARNINGS, DISCLAIMERS, LESSONS LEARNED, ETC.
1.) Tangles may be inevitable.
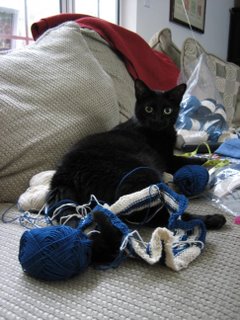
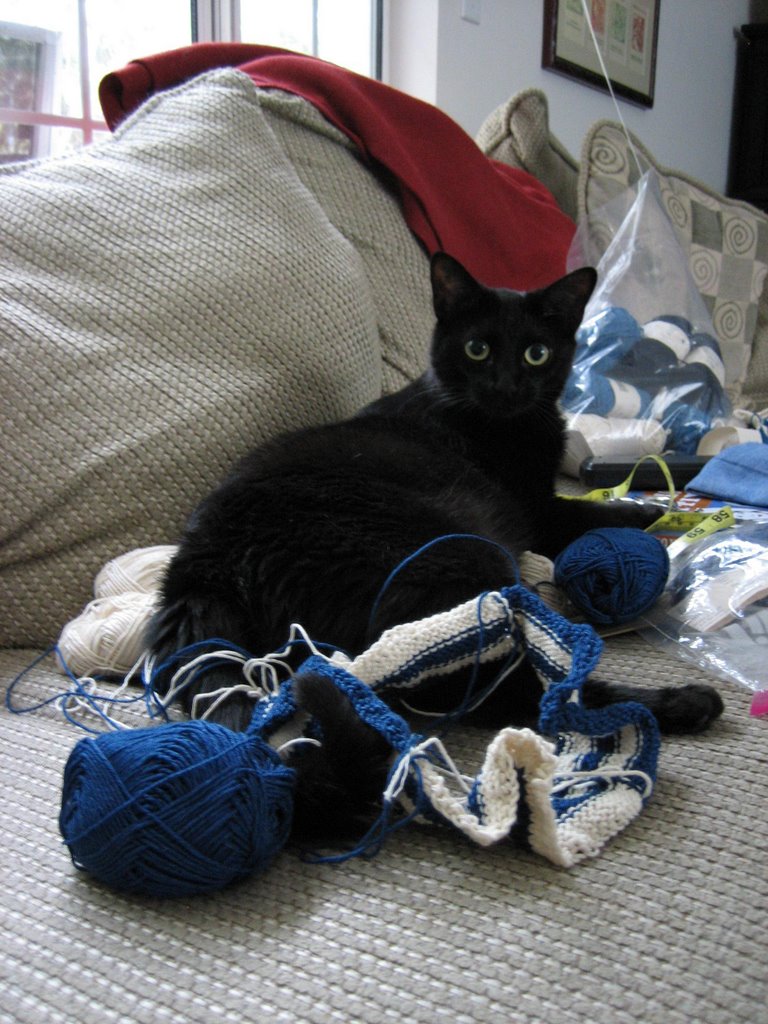
2.) Cats and intarsia don't mix.
THE REWARDS VERSUS MATTRESS STITCH
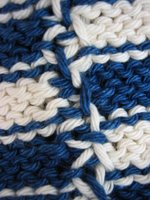
1.) Front is almost as neat as with mattress stitch. (Mattress stitch version on the right).
Center.
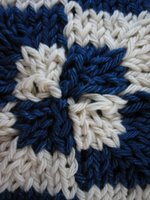

"Seams."
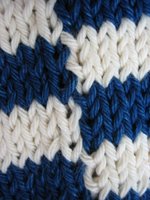
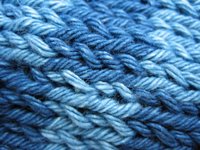
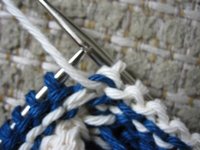
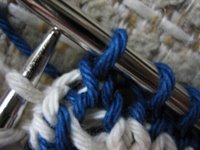
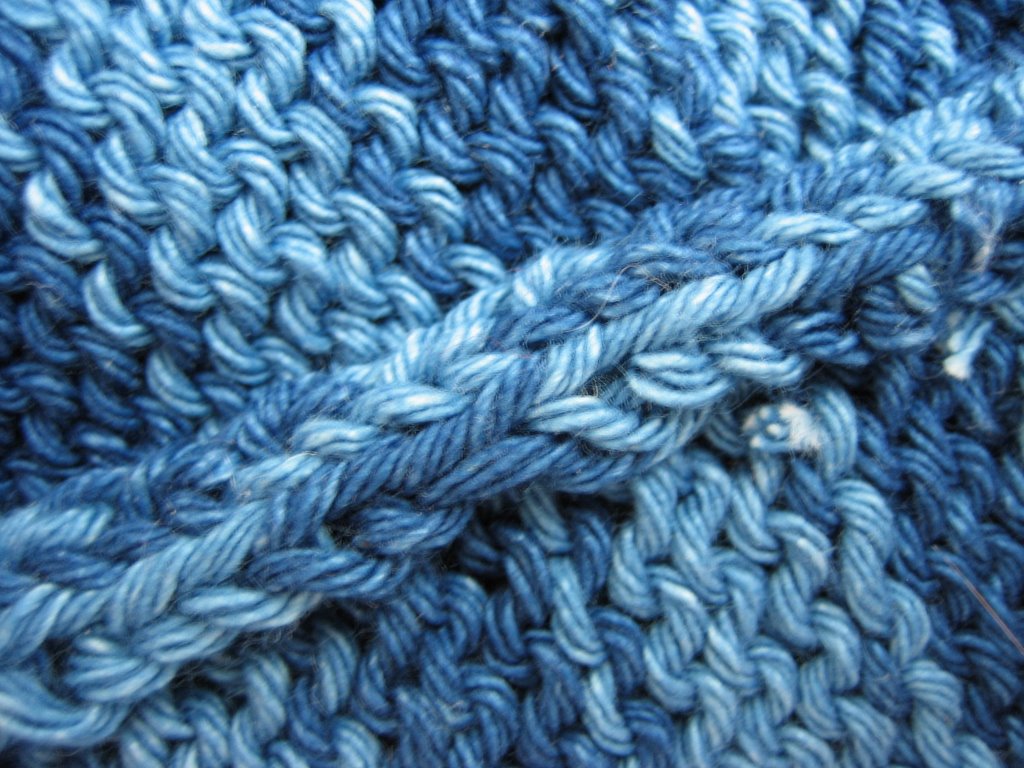
2.) But the back of the intarsia version is much less bulky.
 Mattress stitch.
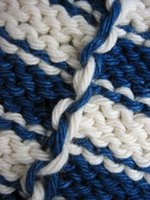 Intarsia transition.
 Joint created by YOs, p2togs, and ssks.
But once I was done with the block, it looked so neat and tidy. Almost as neat on the right side as mattress stitch (and maybe could be just as neat as mattress stitch, for a knitter with sufficient intarsia experience). And much, much neater than mattress stitch on the wrong side. The effect on the wrong side was pronounced enough to convince me that this method might hypothetically be of some use. Someday. To someone not me.
So, here you go.
A Method for No-Sew Mitered Squares: Intarsia "In the Round"

CONS
Fiddly
Tangle Quotient exceeds tolerances
Not Portable
Slow (sewing might be faster)
Low spontenaity in re color choice (must simultanously cast on all four miters in the block)
Generally sucks all the joy out of mitering
PROS
Neat, even on the wrong-side
WHAT YOU WILL NEED
Circular needles and DPNs of appropriate size. I started with a 24 inch circular for the smaller size of stockinette miter (i.e., casting on 48 stitches) using Rowan Denim, which has an approximate tension/gauge of 20 sts per 10 cm/4 in.
Enough skeins (or smaller balls) of yarn to work 4 mitered squares simultaneously. For me, this was eight balls of yarn, 4 each of two colors.
ROUGHLY HOW TO DO IT
Sadly, you can't do intarsia in the round by just knitting round and round. If you try this, you will quickly find that your working yarns don't end up where you need them to be for the next round.
But there is a trick you can use. You still knit back and forth, first on the wrong side, then on the right, just as you would if you were knitting "flat." But at the very beginning of each row, you create an extra stitch with a YO. And at the end of that row, you knit or purl (as appropriate) this YO with the last stitch in the row. This joins the two edges of your knitting seamlessly.
The joining technique is very simple, once you do it a few times. What'll get to you is all the working yarns.
NOTE -- there is more than one method of intarsia-in-the-round out there. They are not all suited for all purposes. I don't know whether another method would work for mitered squares.
SPECIFICALLY HOW TO DO IT
 1.) Using a circular needle, cast on for 4 mitered squares.
Where appropriate, change the yarn used to cast on, so that the color of the cast-on edge is the first color you plan to use for each mitered square. (You could skip changing the colors if you don't mind a border around your block -- that would marginally simplify things and would probably look quite nice.) I used the knitted cast on, but I don't think it much matters.
In other words, I cast on 48 stitches for the first square, changed colors, cast on 48 more stitches, changed colors, cast on 48 more stitches, changed colors, and cast on a final 48 more stitches.
 2.) Row 1 (Wrong Side). YO,
 purl to last stitch (changing working yarns for each miter and twisting the old and new working yarns together at each transition),
 purl last stitch in row together with YO created at beginning of row.
 Turn.
Turn. 3.) Row 2 (Right Side). YO,
 knit to last stitch (changing working yarns for each miter, twisting the new and old working yarns together at each transition, and decreasing where appropriate to form miters),
 ssk last stitch with YO created at beginning of row. Turn.
It is important to use an ssk (or equivalent left leaning decrease) so that the correct color yarn shows on the right side. If you use a k2tog, the border between one square and another at your join will be wonky.
 4.) Repeat rows 1 and 2, changing colors in each miter where desired.
 5.) Switch to DPNs when you like.
 6.) When you are down to 1 stitch per square (4 stitches total),
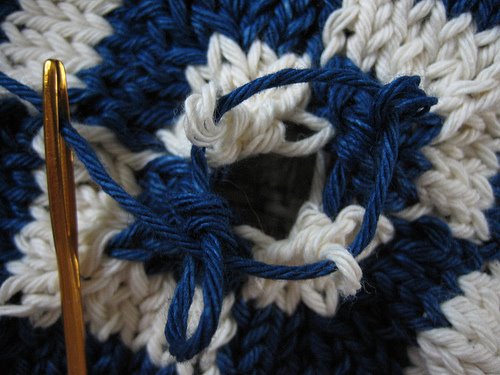 thread one of your working yarns through all four stitches. Pull tight.
7.) Kay's instructions take it from here. You could either make additional individual blocks and then join them later with a 3-needle bind off or crochet or whatever. Or you could pick up stitches from the edge of this first block for your second block. (Insane . . . )
WARNINGS, DISCLAIMERS, LESSONS LEARNED, ETC.
1.) Tangles may be inevitable.
2.) Cats and intarsia don't mix.
THE REWARDS VERSUS MATTRESS STITCH
1.) Front is almost as neat as with mattress stitch. (Mattress stitch version on the right).
Center.


"Seams."


2.) But the back of the intarsia version is much less bulky.
 Mattress stitch.
 Intarsia transition.
 Joint created by YOs, p2togs, and ssks.
Labels: Tips / Tutorials / Experiments
posted by Anonyknits at Tuesday, July 25, 2006
![]()

3 Comments:
You. Are. A. Genius. I could hug you.
What a cute kitty! Now the question is, are you going to continue to knit your blocks this way?
Ang
Heck no, Ang! (I've just about figured out something I like better. Need to spend a little more time tinkering in the secret underground lab, though . . .)
Post a Comment
<< Home